Task Scheduler Runs Our Automation Server — Here's How
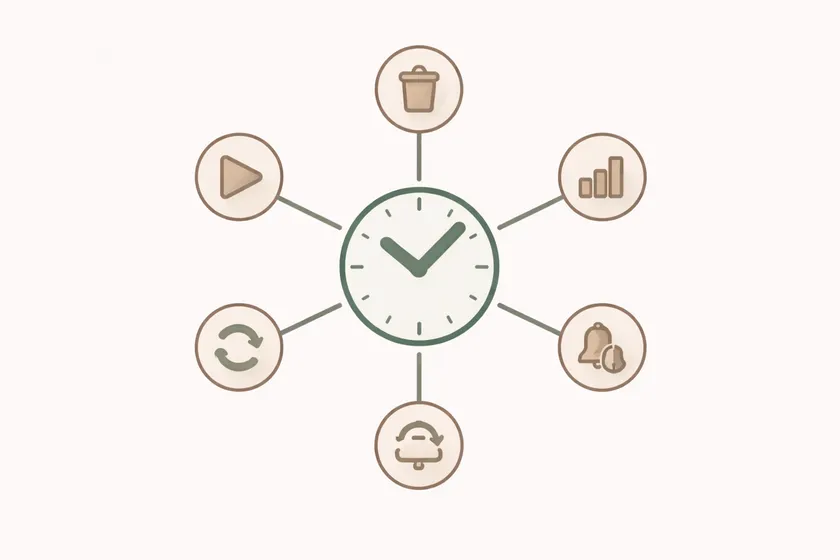
Table of Contents
Our automation server ran out of disk space at 2am on a Tuesday. The nightly Playwright regression suite kicked off, generated 400+ screenshots from failed visual comparisons, filled the last 3 GB of free space, and crashed mid-run. No alert. No notification. The team found out at standup when someone asked why the nightly results weren’t in Slack.
This wasn’t a CI/CD pipeline problem. Jenkins was fine. The tests were fine. The server was neglected — and the fix was already installed on every Windows machine: Task Scheduler.
Why Your Automation Server Needs a Maintenance Plan
Everyone obsesses over the CI/CD tool — Jenkins plugins, GitHub Actions workflows, pipeline YAML. Nobody talks about the Windows box actually running the tests. At a large Canadian telecom, our dedicated automation server ran Playwright suites against 3 environments, 5 days a week. That’s a machine doing real work, and like any machine, it needs maintenance.
The machine fails before the pipeline does
Here’s what accumulates on an unmanaged automation server:
- Test artifacts: Screenshots, videos, HTML reports — our server generated 2-3 GB of these per week
- Browser cache and temp files: Chromium alone can leave hundreds of MB behind per run
- Zombie processes: Browser instances that didn’t close after a failed test, slowly eating RAM
- Log files: Framework logs, driver logs, server logs — growing without limit
Left unchecked, this degrades performance gradually. Tests get slower. Disk fills up. One morning, everything breaks. The insidious part is that the degradation is invisible until it hits a threshold.
Built-in scheduling beats neglected infrastructure
Task Scheduler is free, built into Windows, requires zero installation, and can handle all of this. Here are the five ways I used it to keep our automation server running cleanly.
1. Scheduling Nightly Test Runs
The most obvious use: trigger your test suite on a schedule. Instead of relying on a developer to manually kick off regression, Task Scheduler runs it every night at a consistent time.
Here’s the batch script that launches our Playwright suite:
@echo offecho [%date% %time%] Starting nightly regression >> C:\automation\logs\scheduler.log
cd /d C:\automation\playwright-tests
npx playwright test --project=regression --reporter=html,json 2>&1 >> C:\automation\logs\nightly-%date:~-4%%date:~4,2%%date:~7,2%.log
if %ERRORLEVEL% NEQ 0 (    echo [%date% %time%] Tests FAILED with exit code %ERRORLEVEL% >> C:\automation\logs\scheduler.log    powershell -File C:\automation\scripts\notify-slack.ps1 -Status "FAILED") else (    echo [%date% %time%] Tests PASSED >> C:\automation\logs\scheduler.log    powershell -File C:\automation\scripts\notify-slack.ps1 -Status "PASSED")
To schedule it via the command line (reproducible, version-controllable):
schtasks /create /tn "Nightly Playwright Regression" ` /tr "C:\automation\scripts\run-nightly-tests.bat" ` /sc daily /st 02:00 ` /ru SYSTEM ` /rl HIGHESTThe key detail most tutorials skip: always check the exit code. Task Scheduler happily reports “success” if the batch file ran, even if every test inside it failed. The %ERRORLEVEL% check in the script above catches test failures and routes them to a Slack notification.
2. Log and Artifact Cleanup
This is the one that would have prevented our 2am incident. Test runs generate artifacts — screenshots, trace files, HTML reports, JSON results. They accumulate fast.
# Delete test artifacts older than 7 days$paths = @(    "C:\automation\playwright-tests\test-results",    "C:\automation\playwright-tests\playwright-report",    "C:\automation\logs",    "$env:TEMP\playwright*")
foreach ($path in $paths) {    if (Test-Path $path) {        Get-ChildItem -Path $path -Recurse -File |            Where-Object { $_.LastWriteTime -lt (Get-Date).AddDays(-7) } |            Remove-Item -Force        Write-Output "Cleaned: $path"    }}
# Log cleanup results$totalFree = (Get-PSDrive C).Free / 1GBWrite-Output "[$(Get-Date)] Cleanup complete. Free space: $([math]::Round($totalFree, 2)) GB" |    Out-File -Append "C:\automation\logs\maintenance.log"
Schedule it weekly on Sunday night:
schtasks /create /tn "Weekly Artifact Cleanup" ` /tr "powershell -ExecutionPolicy Bypass -File C:\automation\scripts\cleanup-artifacts.ps1" ` /sc weekly /d SUN /st 23:00 ` /ru SYSTEM /rl HIGHESTThe 7-day retention gives you a full week of debugging history. If a test failed on Wednesday, you can still inspect Thursday’s artifacts on Friday. After Sunday’s cleanup, you start fresh.
3. Disk Space Monitoring
Cleanup prevents gradual disk problems. Monitoring catches sudden ones — like a test run that generates 10x the normal screenshots because a CSS change broke every page.
$drive = Get-PSDrive C$freeGB = [math]::Round($drive.Free / 1GB, 2)$totalGB = [math]::Round(($drive.Used + $drive.Free) / 1GB, 2)$threshold = 10  # Alert if less than 10 GB free
$timestamp = Get-Date -Format "yyyy-MM-dd HH:mm:ss"Write-Output "[$timestamp] Free: ${freeGB}GB / ${totalGB}GB" |    Out-File -Append "C:\automation\logs\disk-monitor.log"
if ($freeGB -lt $threshold) {    $message = "DISK ALERT: Automation server has only ${freeGB}GB free (threshold: ${threshold}GB)"    # Send Slack webhook    $body = @{ text = $message } | ConvertTo-Json    Invoke-RestMethod -Uri $env:SLACK_WEBHOOK_URL -Method POST -Body $body -ContentType "application/json"}
Schedule it every 4 hours:
schtasks /create /tn "Disk Space Monitor" ` /tr "powershell -ExecutionPolicy Bypass -File C:\automation\scripts\check-disk-space.ps1" ` /sc hourly /mo 4 ` /ru SYSTEM /rl HIGHESTAfter implementing this, we caught two issues that would have been midnight incidents: a broken visual regression run that dumped 8 GB of diff images in one night, and a log rotation misconfiguration that let framework logs grow to 4 GB. Both times, the Slack alert fired hours before the disk would have filled completely.
4. Zombie Process Cleanup
This one’s subtle. When a Playwright test crashes mid-run — network timeout, unhandled promise rejection, machine going to sleep — the browser process sometimes survives. Over days, these zombies accumulate and eat RAM. We had mornings where the server was running 15 orphaned chrome.exe instances consuming 6+ GB of memory.
# Kill browser processes not associated with an active test run$browsers = @("chrome", "msedge", "firefox")$zombieAge = 120  # Minutes — any browser older than 2 hours is a zombie
foreach ($name in $browsers) {    Get-Process -Name $name -ErrorAction SilentlyContinue |        Where-Object { $_.StartTime -lt (Get-Date).AddMinutes(-$zombieAge) } |        ForEach-Object {            Write-Output "[$(Get-Date)] Killing zombie: $($_.Name) PID=$($_.Id) Age=$([math]::Round(((Get-Date) - $_.StartTime).TotalMinutes))min"            Stop-Process -Id $_.Id -Force        }}
# Also clean up stale driver processesGet-Process -Name "chromedriver", "msedgedriver", "geckodriver" -ErrorAction SilentlyContinue |    Where-Object { $_.StartTime -lt (Get-Date).AddMinutes(-$zombieAge) } |    Stop-Process -Force
Schedule it every 6 hours, staggered from the test runs:
schtasks /create /tn "Kill Zombie Browsers" ` /tr "powershell -ExecutionPolicy Bypass -File C:\automation\scripts\kill-zombie-browsers.ps1" ` /sc hourly /mo 6 ` /ru SYSTEM /rl HIGHESTThe 2-hour threshold is key. Test runs typically take 30-60 minutes. Anything older than 2 hours is definitely orphaned. This avoids accidentally killing active test browsers.
5. Health Check Dashboard
The other four scripts solve specific problems. This one gives you visibility into the server’s overall state without having to RDP in and poke around.
$report = @{    timestamp    = Get-Date -Format "yyyy-MM-dd HH:mm:ss"    hostname     = $env:COMPUTERNAME    freeSpaceGB  = [math]::Round((Get-PSDrive C).Free / 1GB, 2)    totalMemoryGB = [math]::Round((Get-CimInstance Win32_ComputerSystem).TotalPhysicalMemory / 1GB, 2)    freeMemoryGB = [math]::Round((Get-CimInstance Win32_OperatingSystem).FreePhysicalMemory / 1MB, 2)    uptimeDays   = [math]::Round((New-TimeSpan -Start (Get-CimInstance Win32_OperatingSystem).LastBootUpTime).TotalDays, 1)    chromeProcs  = (Get-Process -Name "chrome" -ErrorAction SilentlyContinue).Count    nodeProcs    = (Get-Process -Name "node" -ErrorAction SilentlyContinue).Count}
# Write to shared network location$jsonPath = "\\fileserver\shared\automation-health\$($env:COMPUTERNAME).json"$report | ConvertTo-Json | Out-File -FilePath $jsonPath -Encoding UTF8
# Also append to local log$summary = "Free: $($report.freeSpaceGB)GB | RAM: $($report.freeMemoryGB)GB free | Chrome: $($report.chromeProcs) | Uptime: $($report.uptimeDays)d"Write-Output "[$($report.timestamp)] $summary" |    Out-File -Append "C:\automation\logs\health.log"
Schedule it every 30 minutes:
schtasks /create /tn "Server Health Check" ` /tr "powershell -ExecutionPolicy Bypass -File C:\automation\scripts\health-check.ps1" ` /sc minute /mo 30 ` /ru SYSTEM /rl HIGHESTThe JSON file on the shared drive means anyone on the team can check the server’s state. We built a simple HTML page that reads these JSON files and displays a dashboard — but even without that, the team could just open the file and see whether the server was healthy.
Before
Manual checks, surprise failures at 2am, 'who has time to look at the server?'
After
5 scheduled tasks, automated alerts, server health visible to the whole team
Setting Up Task Scheduler: The Quick Reference
For anyone who hasn’t configured Task Scheduler before, here’s the common pattern via schtasks:
Create the PowerShell script
Write your script, save it to C:\automation\scripts\, and test it manually first: powershell -ExecutionPolicy Bypass -File C:\automation\scripts\your-script.ps1
Register the scheduled task
Use schtasks /create with the appropriate trigger (/sc daily, /sc hourly /mo 4, /sc weekly). Always use /ru SYSTEM /rl HIGHEST for automation tasks that need to run unattended.
Verify it's registered
Run schtasks /query /tn "Your Task Name" /v /fo list to see the full configuration. Check the “Next Run Time” to confirm the schedule is correct.
Test it manually
Run schtasks /run /tn "Your Task Name" to trigger it immediately. Check the script’s log output to verify it worked.
What I’d Do Differently
If I were setting this up from scratch today, I’d change two things.
First, I’d add Slack alerting to every script from day one, not just the disk monitor. When the cleanup script runs, I want a summary in Slack. When zombie processes are killed, I want to know. Logging to files is fine, but nobody reads log files proactively. Slack notifications turn passive logs into active awareness.
Second, I’d use a single “server bootstrap” script that registers all five scheduled tasks at once. We added these tasks incrementally over months, and keeping track of what was configured on which server was a headache. A single setup-server-maintenance.ps1 that creates all tasks in one run — and is committed to the repo — would have saved multiple “wait, did we set up the cleanup on the new server?” conversations.
The one thing I’d do the same: Task Scheduler over a more “sophisticated” solution. GitHub Actions is great for CI/CD workflows, but for local server maintenance, you don’t need a cloud service watching your machine. The tool that’s already there, always running, and never needs a license renewal is the right tool.
Identify the one maintenance task your automation server needs most — probably disk cleanup — and schedule it today. It’ll take 20 minutes. And you’ll never get woken up by a 2am disk space failure that could have been prevented with the same automation mindset you already apply to your test suites.
Get weekly QA automation insights — no fluff, just battle-tested strategies from 10+ years in the trenches.
Can Windows Task Scheduler replace Jenkins or GitHub Actions for test automation?
Not entirely. Task Scheduler handles time-based and event-based triggering on a single machine — it’s excellent for “run these tests every night at 2am” and “clean up the server weekly.” But it doesn’t provide pipelines, parallelization across machines, PR-triggered builds, or artifact management. Think of Task Scheduler as the local server caretaker and Jenkins/Actions as the orchestration layer. They complement each other — Task Scheduler handles the machine-level tasks that CI/CD tools weren’t designed for.
Should I use schtasks command line or the Task Scheduler GUI?
Use schtasks from the command line. The GUI is fine for one-off tasks, but it’s not reproducible. Command-line configurations can be scripted, version-controlled, and applied to multiple servers. Export your tasks to XML files and commit them alongside your test code. When you provision a new server, importing from XML is a one-line command versus 20 minutes of clicking through the GUI.
How do I handle Task Scheduler failures or missed runs?
Task Scheduler has built-in settings for missed runs: in the task properties, enable “Run task as soon as possible after a scheduled start is missed.” For failure detection, always check exit codes in your scripts and send notifications (Slack webhook, email) on failure. Task Scheduler itself can be configured to restart on failure: use the Settings tab to set “If the task fails, restart every [interval]” with a retry count. For critical tasks, combine this with the health check script to verify tasks actually ran.
Don't miss a thing
Subscribe to get updates straight to your inbox.

No spam · Unsubscribe anytime